Hardscape & Paver Installation
A sweeping driveway that makes a statement or a poolside deck that feels like a resort can completely change the look and functionality of your outside space. But the beauty of pavers is only as good as the work put into installing them.
Our Hardscape & Paver Installation Process
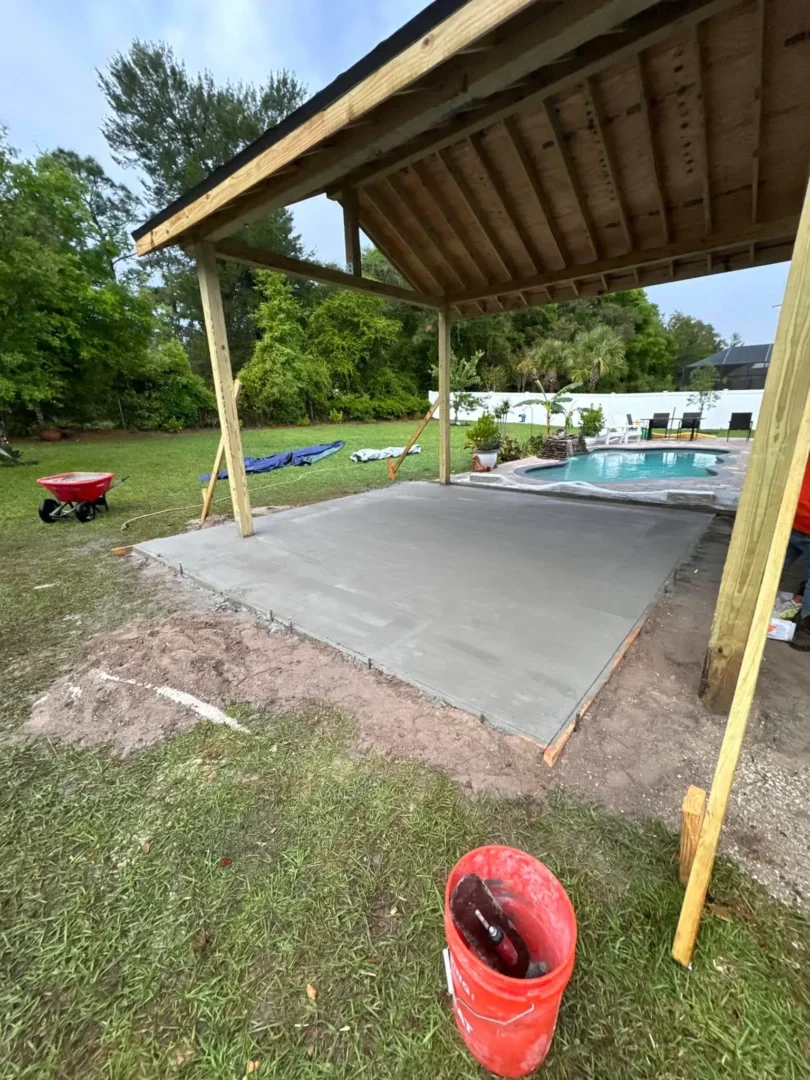
Step 1: Design Consultation & Site Preparation
We assess your property, discuss your vision, and walk you through material samples and layout options. Once the plan is set, we call in utility locates, excavate the existing soil to the required depth, and compact the subgrade. Proper grading is established from the very beginning to ensure reliable drainage so your hardscape doesn’t turn into a river in the rain.
Step 2: Base Construction & Paver Installation
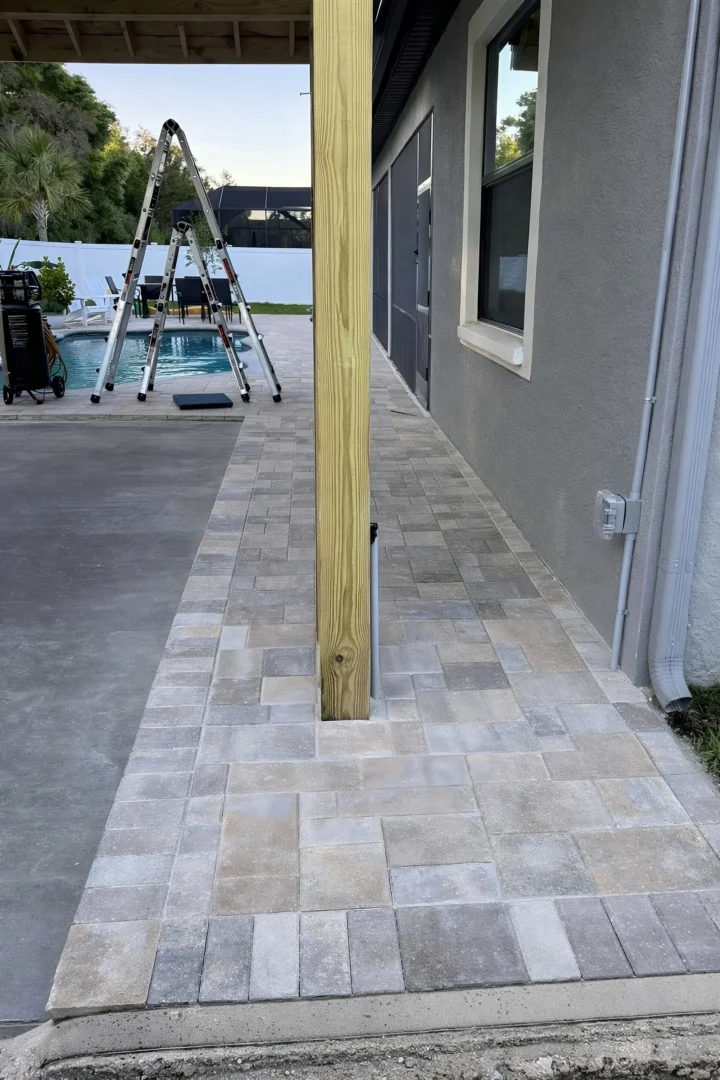
Next, we build a rock-solid foundation, laying 4 to 6 inches of compacted granular aggregate, followed by a precision-screeded layer of bedding sand. With edge restraints secured, we begin laying your chosen pavers according to the approved pattern, checking for level and alignment every step of the way. Each paver is tapped into place and the entire surface is compacted to lock everything together.
Step 3: Joint Filling, Sealing & Final Walkthrough
We sweep polymeric sand into every joint to prevent weed growth and insect intrusion, then run a final compaction pass to seat everything tightly. If sealing is part of your project, we apply a commercial-grade sealer to enhance color, protect against staining, and extend the life of the joint sand.
Popular Hardscape Applications for Your Property
Paver patios and courtyards are far and away the most requested hardscape project we handle. And it makes sense, a well-designed patio extends your living space outdoors, creating a level, stable surface for dining, entertaining, or just sitting with your morning coffee.
What sets a professional patio apart from a DIY job? Drainage. We grade every patio with a minimum slope of about 1/4 inch per foot, directing water away from your home’s foundation. Without that, you end up with standing water, erosion, and eventually pavers that shift out of place. Courtyards follow similar principles but often require more intricate layout work since they’re typically enclosed or semi-enclosed spaces where every sightline matters.
Paver Walkways
Paver walkways connect the different areas of your property, front entry to driveway, patio to garden, house to pool. They seem simple, but a walkway that’s not properly based will develop lips and uneven surfaces that become trip hazards.
Driveways
Paver driveways need to support the weight of vehicles, which means a significantly deeper base: more aggregate, more compaction, and heavier-duty edge restraints. When done right, a paver driveway outlasts poured concrete, without the cracking and staining that can quickly ruin the look of a driveway.
Pool Decks
For pool decks, we select materials with slip-resistant textures and lighter colors that won’t absorb and radiate excessive heat. Nobody wants to burn their feet walking to the pool. The grading around pool decks is also critical. Water needs to flow away from the pool and away from the house, which sometimes means working with some tricky slopes.
Choosing the Right Paver Materials and Patterns
The three main categories we work with:
One detail we always emphasize: pull pavers from multiple bundles during installation. Manufacturing batches can have slight color variations, and blending from several pallets ensures a natural, consistent look across the entire surface.
Paver Sealing
Paver sealing is optional, but we recommend it for most installations, especially in Florida, where UV exposure and heavy rain take a toll on unprotected surfaces.
A quality sealer does a few things. It enhances the color of the pavers, giving them a richer, more saturated appearance (either a wet look or a natural matte finish, depending on the product). It also provides a barrier against staining from oil, grease, leaves, and other contaminants. And it helps stabilize the polymeric sand in the joints, extending its lifespan.