Flooring Installation
A Wide Range of Options to Choose From
Whether you’re after budget-friendly essentials or premium features, our extensive selection ensures you’ll find the perfect option to match your needs and preferences.
Before and After Flooring
Our Flooring Process
Here’s how we seamlessly refresh your floors.
Step 1: Preparation & Subfloor Readiness
Before any new flooring is installed, we remove the existing material and thoroughly inspect the subfloor. We check for moisture intrusion, soft spots, squeaks, uneven areas, and structural deficiencies. Old adhesive residue, nails, and staples are fully removed to create a clean surface.
If needed, we perform subfloor repair, replacement, or floor leveling using appropriate compounds. For wood and engineered flooring, materials are acclimated in the home for 48–72 hours to adjust to temperature and humidity levels. Proper preparation at this stage prevents future movement, gaps, and performance issues.
Step 2: Underlayment Installation & Layout Planning
Once the subfloor is structurally sound and materials are acclimated, we install the appropriate underlayment. This may include foam or cork padding for floating floors, or a moisture barrier when installing over concrete.
We then carefully plan the layout. Chalk lines are snapped for alignment, and the first rows are dry-fitted to ensure straight runs and balanced spacing throughout the room. Expansion gaps are placed along perimeter walls using spacers, allowing the flooring to naturally expand and contract without damage.
Step 3: Precision Installation & Finishing
With layout finalized, we begin installing the flooring according to manufacturer specifications: whether nail-down, glue-down, or floating installation methods. Each row is secured, staggered properly, and checked for consistent spacing and alignment.
Once installation is complete, we reinstall or replace baseboards and trim to conceal expansion gaps and provide a clean finish. The final step includes a detailed walkthrough to ensure the floor is level, secure, and visually seamless.
Types of Flooring Materials and Their Installation Methods
The flooring material you choose dictates not just the look and feel of your space, but the entire installation approach. Each material has specific methods : nail-down, glue-down, floating, or click-lock : and understanding these differences helps you set realistic expectations for timeline, cost, and long-term performance.
Hardwood and Engineered Wood Flooring
Solid hardwood remains one of the most sought-after flooring options for both residential and commercial spaces. It’s typically installed using nail-down or glue-down methods, with tongue-and-groove interlocking edges that create a tight, seamless fit.
Nail-down installation involves using a pneumatic flooring nailer or stapler to secure each plank directly to a plywood subfloor : it’s the traditional method, and it produces that solid, grounded feel underfoot that people love about real wood floors.
Engineered wood flooring, on the other hand, offers a bit more flexibility. It features a real wood veneer bonded over a plywood or HDF core, which gives it significantly better dimensional stability than solid hardwood.
This makes engineered wood a strong choice for Florida’s humid climate, where solid hardwood can expand and contract more than you’d want. Installation methods include click-lock floating (where planks snap together over an underlayment without being attached to the subfloor), glue-down, or nail-down.
We often recommend engineered wood for clients who want the authentic look and warmth of hardwood without the moisture-related headaches.
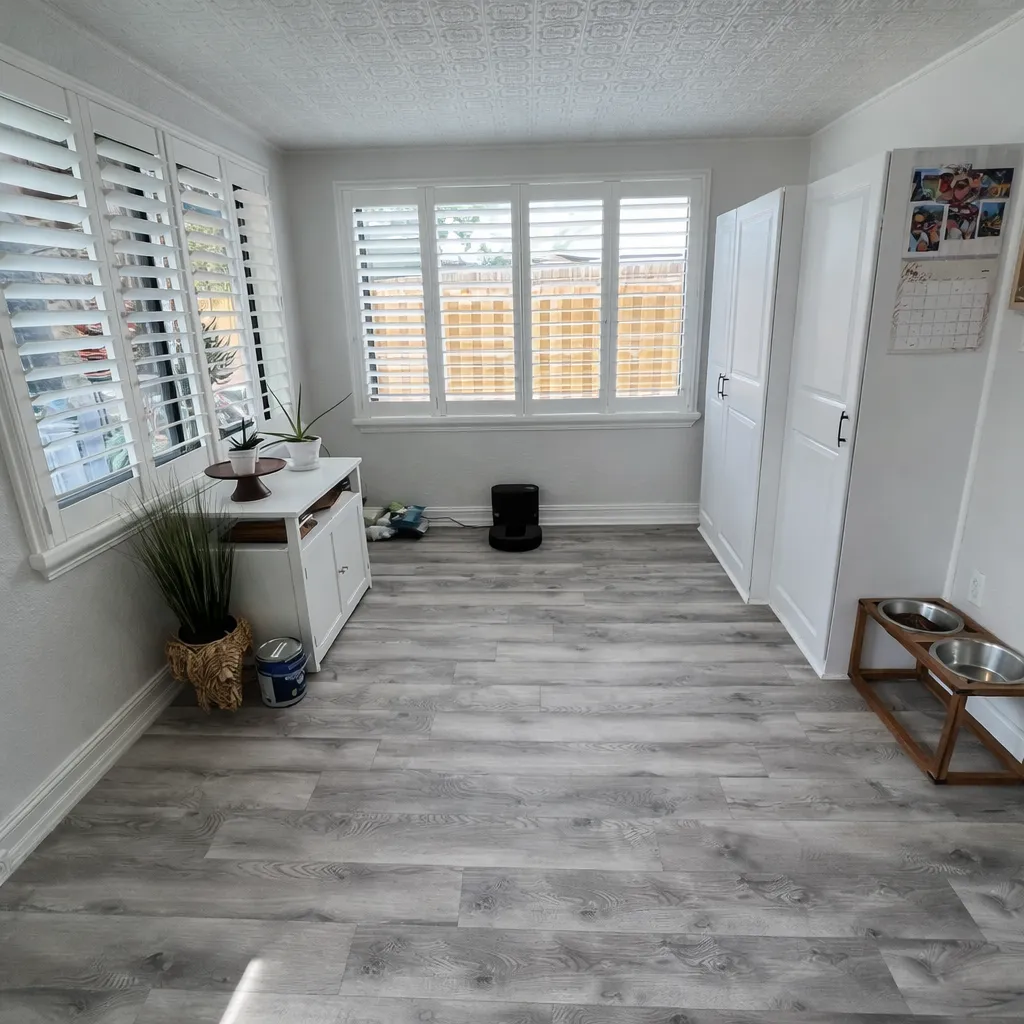
Luxury Vinyl Plank and Laminate Flooring
Luxury vinyl plank : or LVP : has surged in popularity, and honestly, it’s easy to see why. Modern LVP with SPC (stone polymer composite) or WPC (wood polymer composite) cores is fully waterproof, incredibly durable, and available in designs that convincingly mimic real hardwood or natural stone.
Installation is straightforward: most LVP uses a click-lock floating system, though some products offer glue-down or loose-lay options for commercial applications or areas with heavy foot traffic.
Laminate flooring shares that click-lock floating installation method and does a solid job replicating the appearance of wood or stone at a lower price point. But, and this is important, laminate isn’t waterproof.
Its fiberboard core can swell when exposed to standing water, so we generally steer clients away from laminate in bathrooms, laundry rooms, or any moisture-prone area. For living rooms, bedrooms, and offices, though, it’s a cost-effective and visually appealing option.
Preparing Your Space For New Flooring
Proper preparation is arguably the most critical phase of any flooring installation project : it’s where corners get cut most often, and where problems down the road almost always originate. Before a single plank goes down, we focus on making sure the subfloor is clean, level, and structurally sound.
Subfloor Repair, Replacement, and Floor Leveling
This is where we see the biggest surprises on renovation projects. Once old flooring comes up, it’s not uncommon to find water damage, deteriorated plywood, or significant unevenness in the subfloor.
Any imperfections here will telegraph through to the finished floor : meaning bumps, dips, and soft spots become visible and felt underfoot, especially with thinner materials like luxury vinyl plank or laminate.
Subfloor repair might involve replacing damaged plywood sections, reinforcing joists, or simply re-securing loose panels to eliminate squeaks. For concrete subfloors that aren’t level, we use self-leveling compounds : a cementitious mixture that’s poured over the surface and naturally settles into a flat, even plane.
It’s one of those steps that doesn’t look like much but makes a massive difference in the final result. For tile installations specifically, we sometimes use uncoupling membranes like Schluter-DITRA to prevent cracks from transferring through. Getting the subfloor right isn’t glamorous work, but it’s the foundation that everything else depends on.
Flooring Removal and Replacement Considerations
Replacing existing flooring adds a layer of complexity that new-construction installs don’t have. The removal process itself can be straightforward or surprisingly involved, depending on what’s currently on the floor and how it was originally installed.
Glued-down hardwood or vinyl, for example, requires careful scraping and sometimes grinding to get a clean surface underneath. Carpet removal is generally simpler, but you’ll still need to pull tack strips and deal with any adhesive or staples left behind. And then there’s tile : removing old tile can be loud, messy, and time-consuming, sometimes damaging the subfloor in the process.The key consideration after removal is always the subfloor condition. We’ve pulled up seemingly fine-looking floors only to find water damage, mold, or subfloor material that’s past its useful life.
This is why we always budget time and contingency for what might be lurking underneath. It’s also worth thinking about height transitions between rooms if you’re replacing flooring in only part of the home : different materials have different thicknesses, and mismatched floor heights create trip hazards and look unprofessional.
We handle the transition strips and threshold adjustments as part of the overall project, so everything flows seamlessly from room to room.
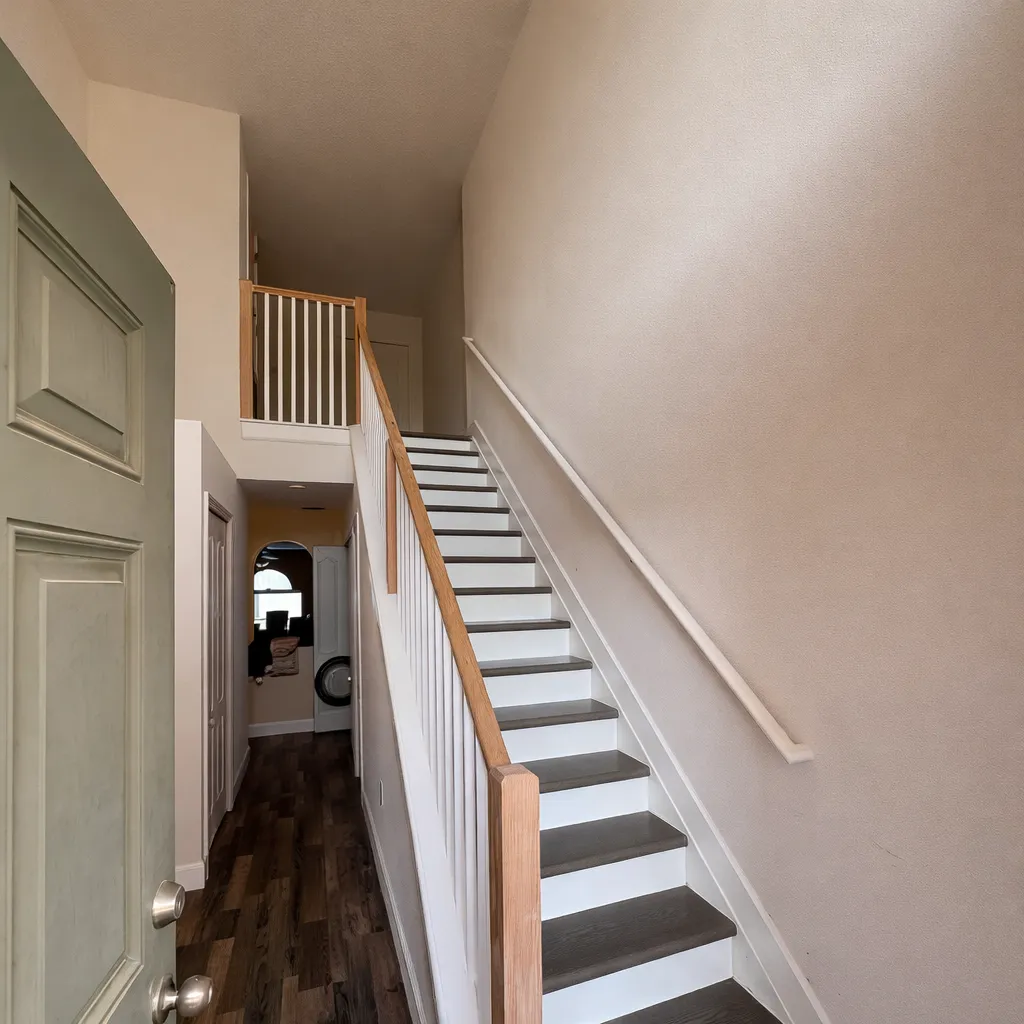
Stair Flooring Installation
Stairs are often the trickiest part of a flooring project, and they require a different approach than flat surfaces. Each tread and riser needs to be individually measured, cut, and fitted : there’s no running planks straight through like you can across a room. The precision here matters more because stairs endure concentrated foot traffic and any loose edges or poorly fitted nosing become a genuine safety concern.
For hardwood and engineered wood, stair treads are typically glued and nailed in place, with purpose-made stair nosing pieces that create a finished, rounded edge at the front of each step. LVP stairs follow a similar glue-down approach, using specialized stair nose trim pieces matched to the flooring line.
One thing we always discuss with clients is material continuity. If you’re installing hardwood or LVP throughout the main living areas, carrying that same material up the staircase creates a cohesive, high-end look that really ties the home together. It’s a detail that makes a bigger visual impact than most people expect.